How Not to Replace an RV Bathroom Faucet
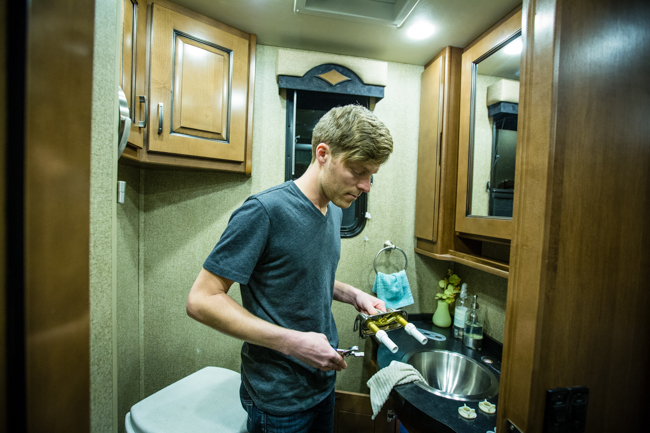
Replacing a bathroom faucet should be one of the easiest Do-It-Yourself modifications one can do in an RV. In fact it’s so easy I told Nikki “I won’t even need any tools” and “it should only take me an hour!”
Since I’m writing an entire post, and the video below is 11 minutes 25 seconds long, you can guess I hit a few road bumps along the way during my bathroom faucet swap. So with my head held low in shame, may I present our video on How NOT to Replace your RV Bathroom Faucet!
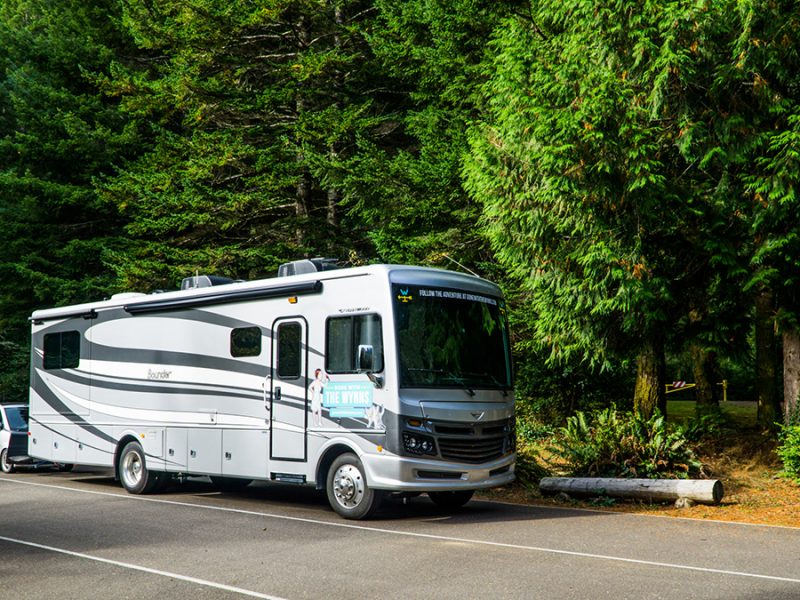
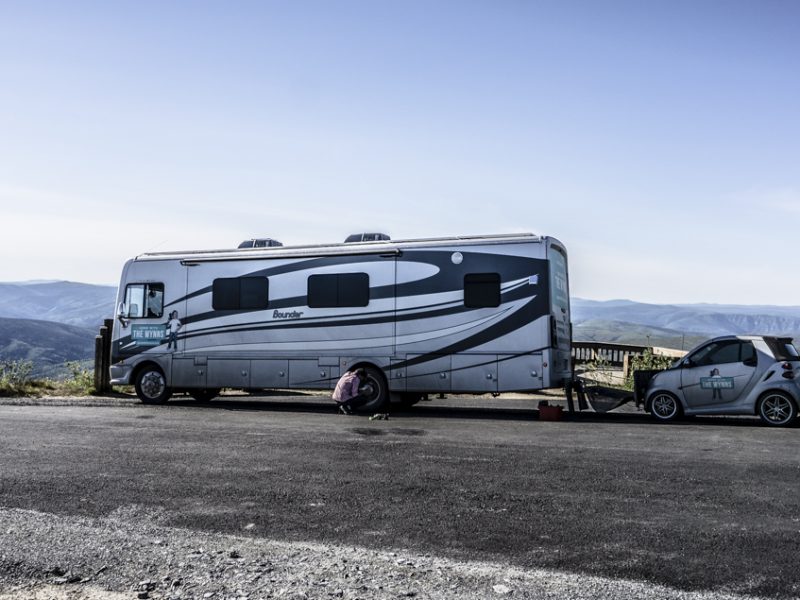
So why change the faucet in a brand new RV? Actually Roy is a test vehicle and one of the cool parts about our relationship with Fleetwood is to provide feedback. After living with Roy for a few weeks we realized the bathroom faucet needed to be replaced. I emailed the marketing manager and this was his response: “Great Feedback, I sent your email to the COO and Chief Engineer and we agree; all 2015 Excursions will have new faucets in the bathroom.” Then I received an email from the Senior Owners Relations Rep “Looks like the faucet in the Expedition should fit no problem.” And this is where it gets fun: Follow-up email from the marketing manager “We’re sending the new faucet, should be an easy swap…and it’ll make a fun video!”
I’m sure you can guess my response: Did you see my How Not To Install a Composting Toilet Video?!?
As you can see it really is a simple swap, you don’t need a lot of tools, there’s no cutting, gluing, or any real modifications. If I wouldn’t have hit any ‘bumps’ in the install I could have had this faucet replaced in less than one hour. Attempting a do-it-yourself handy man project and making silly mistakes along the way really helps me with some life lessons:
Lessons Learned:
- Take your time, there’s no rush! Think it through and test before you just dive right in. After I finished the install I was complaining to Nikki and her reply was “you were in a rush”…no I wasn’t, I replied…”you had to do it 3 times!” As usual she was right, I knew the install was simple so I didn’t really think it through.
- Read the Instructions! While cleaning after the install I picked up the plastic faucet shank extension box and on the back it reads: Instructions: Tools Required: Pipe Thread Tape 1. Wrap faucet shank threads with pipe thread tape. I wasted an hour trying to tighten the heck out of those plastic extensions, if I had just read the first line on the back of the package it would have saved me so much hassle (to be fair when I purchased the extenders the sales manager said “You don’t need Teflon Tape for this, I could sell you some, but you don’t need it”…so much for that!).
- I’m not that handy! When we purchased a house nearly 10 years ago we remodeled everything, it was a total pain in the butt and the reason we decided to sell it and move into a high rise apartment downtown just 5 years later. When we sold that house I think my handy man capabilities stayed with the property.
We still think a majority of bathroom faucet setups are complete crap in RVs, so there’s a good chance we’ll be doing this again in a future RV or Sailboat. I hope this video and post will make your life a little easier when it comes time to replace your RV faucet, after all that’s why I keep making these ridiculous install videos!


Laurie S Murray
This is totally my husband minus LOTS of 4 letter words.. might I suggest adding a set of channel locks for your toolbox? 😍
Eric smith
Great to know those extenders exist! Cheers!
Kdawn
I love the video. This is EXACTLY how it would have went for me. Learning the hard way step by step, re-doing things. Great Job!!! I am going to attempt it, hopefully keeping all the extra steps in mind. Thank you for sharing the video
Lisa
I love that you showed all the ‘oops’ moments. You could have edited it to make the install look flawless, I appreciate you showing the human side of installations for normal folks. Thanks again, it was super helpful!
Matt Pruitt
I know weight and space is precious on an RV, but this tool works wonders next time you have to plumb a sink: http://m.homedepot.com/p/RIDGID-Faucet-and-Sink-Installer-Tool-27018/100595073
David L Russell
I think we have all been there. Appreciate the video! Question: Do standard faucets work with most RVs or do you have to buy an RV faucet?
Jason Wynn
Many RVs use standard faucets, however you may need an adapter to plumb into the PEX piping. It’s best to double check your current faucet by removing it and taking it into the hardware store with you.
Tom
Don’t worry Jason, most of us that have attempted a faucet swap or any plumbing project have run into the same thing. We just need to be grateful for wives and girlfriends that are willing to point out where we went wrong! LOL!
CE
If that is the worst you did, you did good. Just a learning curve. Anytime you deal with water there will always be at lest one leak. lol.
Jason Wynn
Thanks! It felt like an eternity to install something so simple.
Joe
Good job…. Just one thing you put the Teflon tape on the wrong direction . You want the tape going same way as you tighten the nut….
Ginny
Love your video! We had problems when we replaced the faucet in the kitchen on our old 5er. My husband said that whenever we do a project it always takes 4 times as long and cost twice as much.
kristi
For all the. “great ideas” i come up with, my husband is now weiry of the saying : “well you JUST…”. Because he’s the one that has to do it. I feel that you have given me all the information i need to do my. bathroom sink faucet all by my self. And thats what the video did, was help us that. think we can’t overcome
Julie & Marc Bennett
Oh Jason. You are very brave sharing this video – good on you! Marc and I both say you keep the rights to your ManCard – as it takes a real man to share a video of his installation “adventures” with the world online, PS. Marc was also saying “You forgot the locking nuts” but I think he realized you wouldn’t hear LOL. How did you keep the inside of that small cabinet so well lit during the video? Nice job. Glad you have a better faucet now 🙂
Stephen
Great video … you get better every time!
BTW teflon tape also has directions… you should know about 🙂 hint wrap the tape in the tighten thread direction “google it”
Cheers & post more
KC
Your fix-it videos are classic’s!
Always good for a laugh.
Also your cats always crack me up.
Thanks for your uploads.
Dee White
Well done, Jason! You got it!! Now that sink is ridiculously small. I think you should put a bigger one in.
Skinny Badger
I’ll man up like you and just say it always takes me longer than I think to do one of my “easy” projects. I really enjoyed the “show”. For a change it wasn’t me forgetting to look at the directions, making 1-2 trips to the hardware store, putting a piece in backwards, etc. Thanks for sharing another chapter in your adventure. Keep them coming!
Mike Hengehold
As someone that hates plumbing projects I could feel your pain and really appreciated your colorful language. I only wish I could have heard the language after you turned off the camera! In any case your calm behavior after 5 hours was mighty impressive. Keep up the helpful videos.
Randall Payne
That was great and honest… I have done the same things in the past. I really have enjoyed the how to/tech videos. Thank for taking the time to make them. My wife and I are looking forward to your future comparison of Windy and Roy. And please – sailboat is a dirty word, we will miss your RV adventures. Thank you again…
Jason Wynn
I hate filming these how to videos because it takes so long to put together with all my mistakes….but one day I’ll do it right and the video will be easy to film and create 😉
Cathy & Norm
Congratulations on a successful plumbing project.
You may be interested in my ” Honey Do… Project Rating! ”
Here is your rating for this project:
ECT —- 1
TU —— 2
OPS —- 9
BAU —— 0
RDAP —–yes
Now for the meaning of these letters:
ECT. Extra car trips
TU. Tool used
OPS. As is or could be the total of four letter words used
BAU. Band Aids Used
RDAP READ DIRECTIONS AFTER PROJECT yes or no
Not bad! You do get penilized for continuing a plumbing project after 7:15 pm . This can be a very large mistake with the hardware store more then 30 miles away!
Jason Wynn
Love it! virtual High Five on its WAY….BAM!
Larry
Thanks for the good laugh and the great lesson! Always read the directions, measure, and assemble tools first!
Jason Wynn
Don’t forget one of the most important rules: Measure twice and cut once 🙂 I do know that one!
Ginger
oh my, my, my, Jason, you’re so honest it’s fun to watch. I too have done a few projects that required extra trips to the hardware store. I have moved, changed, painted and built something in every inch of my house. I ran out of stuff to do so I bought a vintage Airstream. You want to talk about tight spaces. I have finished it and enjoy camping and showing it off at rallies. Now I’m waiting to see your solar upgrade before taking that next step and making it feasible to wild camp. I love the cat 🙂
Jason Wynn
Loving the new Solar (don’t worry I didn’t install it) can’t wait to put together a video about it. Need to live with it a bit first.
Jim LeTempt
The three words I fear the most are, “Some assembly required.” I could have done that job in a lot less time…. because I would have paid someone else to do it! As a professional photographer and videographer I really enjoy your work…. your video work.
Jason Wynn
Haha, I hear you Jim. Like I always tell Nikki: You get what you pay for! and I’m free so….
Rick
Jason, your video’s are so entertaining, we’ve all been in those situations its just that nobody was watching. The sad part is I find myself talking to you as I watch,, “Jason, wait your forgetting the locking nuts on the counter” just to hear my wife remind me…”’Rick he can’t hear you its a video”.
Jason Wynn
…stupid locking nuts. haha.
Sonny Hale
Looks like you and I went to the same school of RV repair. That’s OK. If an RV dealer had done the same work it would have been $150.00
P.S. 179 days, 15 hours, 32 minutes and 50 seconds…………But who’s counting?
Jason Wynn
probably more like $300! Some of those RV shops are worse than me at installing stuff!
PS 179 days, 5 hours, 32 minutes…..
Sally
Bottom line…all’s well that ends well!!
Jason Wynn
So far…
Rick
Jason – Great under-sink camera positioning and lighting! We could see all your leaks – over & over – very clearly!
So while your may have to go back to plumbing school, your photography skills are looking good!
Steven
Perfect ! Thanks for sharing
Jason Wynn
Perfect?!? did you watch the video 🙂 HAHA.
jack
Been there, done that! Usually takes me three trips to the building supply store to finish a project. kudus for sharing.
One little caveat that you should be aware of… Teflon tape needs to be applied in the direction of the pipe threads. You installed one backwards. I would keep an eye for a leak in the cold supply line. But it’s only because of your awesome camera work that I picked out that detail.
Keep ’em coming.
Jason Wynn
I’m thinking of replacing the plastic piping now that I’m in a bigger town…I’ll make sure to run the Teflon tape correctly this time. I wondered why it kept moving on the cold water side.
Bill
Next time you visit a hardware store ask to have them show you a faucet wrench. In your case you will probably only need one once or twice a lifetime but it would have greatly reduced the pain of your recent adventure! Don’t let the learning curve discourage you….after your first four or five motor homes you will be expert in all required skills!
I love the way you guys share the fun and the adventures of life on the road. Keep up the great work!
Jason Wynn
Thanks Bill. I guess I should have installed at a proper RV park, then we could have borrowed the proper tools.
rick
Yo Jason,
Whoever invented plumbers tape deserves a medal!
Good job.
Jason Wynn
ha, cured that leak problem didn’t it?
Scott Jermyn
When working on plumbing or any other service it’s always best to do it Monday – Friday 8 AM to 4 PM. That’s so when you break something and have to call a plumber or electrician they are cheaper. LOL. If you two every make it to Memphis, TN I’ll hook you up with a box full of tools, or the beers, either way works for me.
Jason Wynn
We just might park in your driveway for a few weeks…we’ve got some upgrades to do 🙂 just to get it straight: I can park at your place and you will give me beer, tools and assistance in repairs?
Jennifer Windisch
Great video, thanks for sharing. I’m now thinking about replacing mine for the same reason.
mary
Feeling your pain! At least you were finally successful!
Karen
Beware the “one hour job”……
Mike Laudenslager
This is just how projects go…I figure A least a couple trips back as par for the course. I would have been fearing for the life of my DSLR if there were a gusher under there!! Nice work, have a beer on me!
Jason Wynn
sending the “beer me up, scottie” your way now…I’ll have a porter please!
John Enlow
Long as you did the job yoursellf and completed it I say you sir still have your man card. It’s more then what most people our age can do these days.
Jason Wynn
Thanks John, I needed to hear that!
Steve C
I consider myself a pretty good DIY’er but no two projects are ever the same. Before I start, I always allow way more time than I think it will take because it almost always takes two or three trips to the hardware store to finally get it right.
I was a construction estimator, (back when I was working lol), and I was always “guessing” how long it would take a guy or crew to do any one of a million different tasks. Like most engineers, you do the math to the gnats’ a__, then multiply by 2. I’d break down any task then add a certain percentage of extra time based on it’s difficulty or my knowledge of having done it before with documented results. Also, I’d always add in “Mickey Mouse” for additional unforeseen material requirements.
So, it’s not only the weekend warriors who get it all screwed up, it’s also the professionals. However, we always had an out. My estimate (in the office) was never wrong, it was always the guys in the field taking twice as long and busting the budget! Fingers always point both ways.
I had a big smile on my face as I watched your flick. I’ve also done some of the same knuckle head moves. 🙂
Jason Wynn
Ha, Thanks for sharing Steve!
Gordon Medley
If you could have only heard me shouting “Teflon Tape Teflon Tape” you’d be laughing. Hope this isn’t the last DIY video, they are fun and I give Jason credit for posting the video. One thing for sure, I’ll bet Jason never forget to use teflon tape again :0
Jason Wynn
I now carry 2 rolls of Teflon Tape…just in case 🙂
Ken
This video made me laugh and feel good at the same time. I am glad to see that there are others like me. So many times; the wrong part, wrong tool, and the wrong guy working on it. Namely me !
Jason Wynn
…the wrong guy working on it…too funny Ken.
Ken
Good job.
Some advice:
1) You needed a basin wrench instead of pliers and channelocks.
2) Perhaps you should have checked under the bathroom in the storage area to see if the flexible pipe had some slack available.
Otherwise, you kept at it and did a good job.
I knew you were going to forget the nuts to secure the faucet. I have made those mistakes myself. That is how I learned.
Jason Wynn
no slack on the pipes, that would have been nice. Problem is I’ve made all these mistakes before, it’s just been so long since we owned a home I have forgotten again!
Bob
Great video, I have to do this project on my HI-LO and now I won’t feel bad when I tell my wife that you taught me how to do it…both ways.
I enjoy your travels; keep up the fun.
Jason Wynn
Bob, remember to tell her I told you how NOT to do it, which can be argued is more helpful than actually doing it correctly….right?!?
Jim & Diane
I agree…Most RV lav faucets are not user friendly. Just like you stated…not enough room under them to get your hands in. Your camera positioning and lighting set-up were great…
Keep up the great video productions..
? from the raw footage on this DIY project, how long does it take (man hours) to edit it down, and write text, to what you use as the final cut / finished product?
Jason Wynn
Lets just say if the video gets 5 million views I might make enough money to cover my time 🙂
Seriously I probably invested 40+ hours into this video along with the article and Nikki invested a solid 10 hours.
Paula, Jacksonville Florida
Jason, you have such patience!!! So glad you still posted the video 😉
Nikki , I would have been laughing the entire video…you both are sooooo cool, and we appreciate all you do for your fellow RV’ers!! I have shared your blog with everyone I know!!
Keep up the good work
Jason Wynn
Thanks Paula, Nikki pretty much left me in there by myself to make all the mistakes…then when I was done complaining she would come in and film me.
Thais
We love these videos- they make us feel better about our handy,an shenanigans !
Bayrider
I hope no one ever looks under the sink at those fittings!
I feel your pain, for me all plumbing jobs are to be avoided at all costs unless water is running all over the floors.
On the other hand your video skills are top notch!
Michelle
I have the same problem, but I don’t think I have the clearance under the medicine cabinet to replace it. Do you need an RV faucet or would any bath faucet fit?
Jason Wynn
I’m sure a standard faucet will work fine.
Stu
This is exactly how every @$*#@$ repair/upgrade project goes for me. Congratulations how staying the course and finishing! Kudos to Nikki to not voice over with “I told you so”.
Nikki Wynn
oh stu, you don’t know how hard it was to keep my mouth shut!
Steve Fischer
Jason I admire your willingness to attempt this type of alteration and to do a video documentary on the process.
Sometimes, however, it just pays to read the directions first. (Trust me, I’ve been there, done that)
Be careful when working with plastics in these types of applications. Tighter is not always the best way to go.
Bill Edwards
Ditto Lou’s comment regarding the time it actually takes to complete a project.
You deserve kudos for taking on DIY projects and not giving in when the going gets tough.
Thanks for sharing this informative and entertaining video.
Cheers
Bill Edwards
Jacksonville ,Florida
Jason Wynn
Thanks Bill!
Louis A Waters
Rule No. 1 nothing is easy!
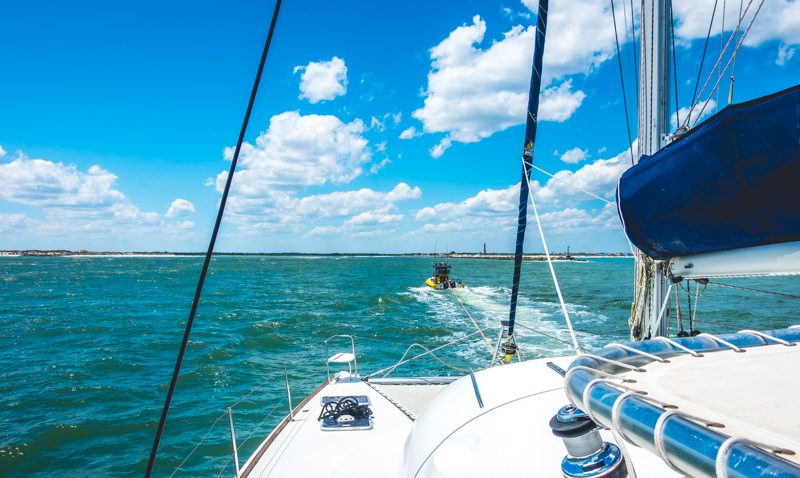
I used to say that working on my boat and every little project took longer than expected. I have much better luck working on my travel trailer. I once spent 8 hours startling one of my 305 cu. in. Engines with my knees on the exhaust manifolds trying to replace a blower motor four months later I had to have a complete knee replacement. Good by boat!
Love reading your posts and following your travels. If you come to the outer banks would love to meet you.
Lou
PS even have my wife reading your blog now.
Jason Wynn
oh man we’d love to visit the outer banks again! Not stoked about the repairs that come along with a boat 🙂
Jerry
Loved the video, ( how not to’s) are so much more interesting than the perfect step by step no mistakes videos.
The take home message is always reads the manual/instructions, but that is boring. Just do it…
Jason Wynn
Yea, I like your style Jerry!
Rudy Hernandez Fellow RVer.
You did a great job…. The troubles you ran into, happens to everyone….
Mark
This is a *priceless* video. This is *exactly* how everything we ever attempt goes for us. Glad to see you prevailed in the end.. and faucet shank extenders! I would have cut off the pex lower and used stainless braided faucet hookup lines (and paid a lot for them too probably).
Jason Wynn
Thanks Mark!