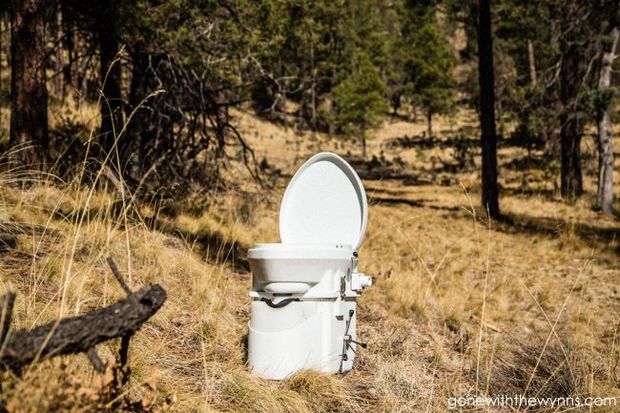
Are you still on the fence about installing that composting toilet in your RV?!? The biggest questions we get about our toilet (behind “Does it smell?”) are What do you need to do to prepare the toilet for use? and How the heck do you dump a composting toilet? At this point we’re pretty seasoned in the art of all things composting toilet related, so here’s our thoughts on how to prep and dump a composting toilet.
The first major decision after purchasing a composting toilet is deciding what to use as your compost material. We scoured the internet, visited the local hardware store to see the size of the peat moss bags (its giant!), and desperately tried to locate some Coco COIR at 5 different garden shops.
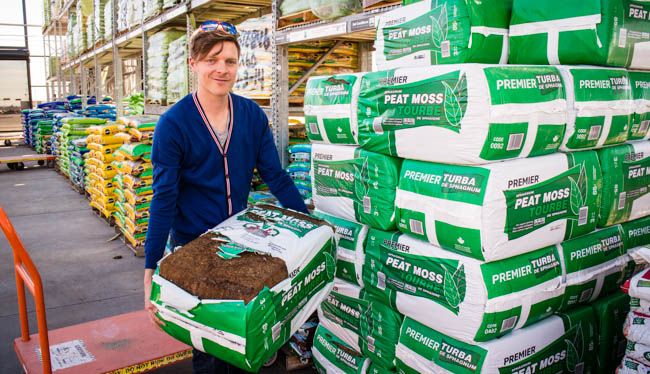
You can purchase Coco COIR at the hydroponic shop (also known as the grow your own mary jane shops in some towns), or you can order though our store. In the end we decided to use Coco COIR as it is a more eco friendly and sustainable option for composting than Peat Moss.
Do not remove your old toilet and begin installing your composting toilet until you have the composting material, otherwise you will not be able to go #2 in the RV!
How to Prep
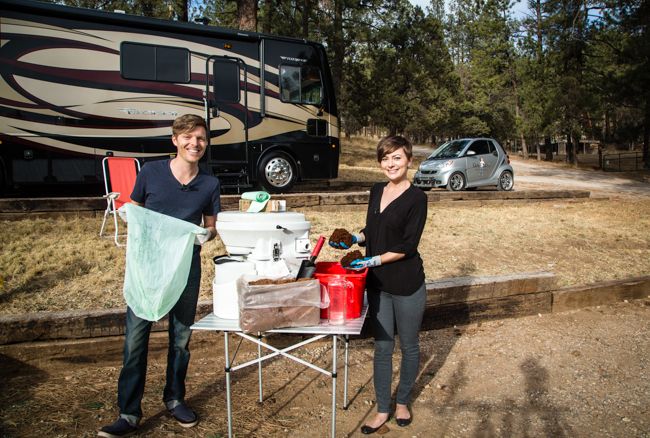
Prepping the toilet is very easy, sanitary and relatively quick. This 10 – 15 minuet process is best done outside unless the weather is icky. You’ll want 2 liters of water, a bucket, gardening gloves and a shovel.
- Take off the top, aka the seat and set it out of the way.
- Break off enough coconut coir or sphagnum peat moss (about a 1 gallon buckets worth) and place it in your bucket.
- Hydrate the coco coir or sphagnum peat moss (typically comes dehydrated in a solid mass) with water until no dry clumps are visible and it has the look and feel of fresh garden soil (damp and crumbly, not wet). I use approx 1.5 – 2 liters of water.
- Pour the hydrated coco or moss until it levels out just under or at the agitator.
- Put the toilet back together and its ready for use.
Tip: Do not put a plastic bag inside the base, it will not work and isn’t necessary or helpful.
The Liquids
The liquid container of our composting toilet holds 2.2 gallons, and trust me you don’t want to wait till it’s full to dump. The liquid tank is somewhat translucent and you can see the pee line when it’s about 2/3 full, this alerts us it’s time to dump! We typically dump the urine tank every 3-4 days depending on how much we’re around the RV. This process can be a little stinky, especially if you’ve eaten asparagus since you’ve last dumped, so use caution on where you decide to dump (see below). I would recommend purchasing a second liquid tank, you never know when you might need it (especially if you live on a boat and accidentally throw it overboard!).
- Open the top, aka the seat, and lift to a 45° angle.
- With your free hand grab the handle, pull out the liquid tank and cap it.
- Dispose of Liquids
- The Shower Drain Dump – Once you master the technique this can be done without making a mess and with very little smell. I close the hallway door, open the bathroom window and the vent fan, but I do not turn on the vent fan. This is my preferred way as I know it’s legal and I don’t have to worry about some nosey neighbor calling the police on me.
- The Running Dump – Rich in nitrates urine is often called liquid gold, but you must make sure it’s legal to dump before doing so, and you do not want the urine to puddle. I have mastered the running dump where I hold the liquid tank near the ground and run while slowly dumping. This technique works well but you should not dump it right by your RV or the smell can linger. I only use this when staying in BLM or National Forest where we’re far away from other campers.
- The Rainy Day Dump – If it’s raining pretty well outside and we’re in a parking lot I sometimes just let it loose on the ground (if there is a city drain nearby). This is great as it doesn’t smell at all and it’s completely natural (if you go out nude you can get a shower too! Totally Joking).
- The Regular Toilet Dump – I have done this at a rest area in the past and it works fine if you flush while dumping the urine, but then you’re wasting water to dispose of the urine which seems to defeat the purpose of a composting toilet.
- The Pit Toilet Dump – Works well, hardly any smell at all (unless the pit toilet is overused or not well maintained already…you know what I mean). I’ll often use this method while staying on National Forest and BLM where a pit toilet is available.
- The Waterless Urinal Dump – The absolute worst way to dump, I did this at a BLM bathroom and about killed myself! Something about the way the waterless urinals work makes the urine smell amplify…I do NOT recommend this method.
- Once you’ve dumped, if possible, rinse tank with a little water (enough to cover the bottom), swirl like a fine wine, and dump. This helps reduce any build-up that may occur on the bottom and sides of the plastic bottle.
- Place the liquid bottle back into the toilet and clamp down the seat before use.
- Wash your hands and pat yourself on the back for a job well done.
The Solids
When it comes time to dump the toilet we typically judge by the handle on the base. When the handle becomes difficult to turn it’s time to dump and change the compost, if you want to visually measure it’s time to dump when the base is ¾ full (it will look and smell like dirt inside other than the pieces of white toilet paper). This process is clean, it does NOT smell and takes me about 5 minutes. For the two of us using the toilet full-time, it takes around 3-4 weeks for the compost bin to “fill up”. If you enjoy keeping a bowel calendar, or if you always go once per day, then you can do the math: Nature’s Head recommends dumping the toilet after 60-80 uses depending on how much toilet paper you like to use.
If you are using the toilet full-time you want to wait at least 8 hours after your last deposit before emptying the composting toilet. We typically dump the toilet in the morning so the waste has the entire night to start the composting process before we begin the dumping process. This can be risky if you are an early morning pooper, or if you ate spicy food the night before, and you try to hold it till the compost has been freshened, so you’ll need to find a schedule that works for you. If you want to give your waste more time to compost you can purchase a second base (it comes with a bungee lid) to store the compost and allow it to decompose even further before dumping. Here’s the process I use to dump the solid side of our composting toilet:
- Put on Gloves (recommended if you are using the toilet full-time and optional if the contents have sat long enough to be fully composted).
- Remove the Liquid Tank and cap it (the last thing you want to do is accidentally knock it over).
- Unplug the vent hose and power cord, unscrew the two knobs holding the base to the floor, remove the entire toilet and take it outside (yes, your neighbor may look at you funny).
- Remove the top, aka the seat, and set it on the ground.
- Cover the top of the base with a 13 gallon Trash Bag; it is (typically) a perfect fit. We use a composting bag because it’s better for the environment as it will biodegrade much more rapidly than plastic. The downside to a composting bag is they are thinner than a normal plastic bag so you must be more careful so the bag doesn’t rip, they’re also more expensive but we’re only using 15 in a year so cost is sort of a moot point for us.
- Fill the base with hydrated COIR, take the toilet inside and reconnect the lid, power supply, vent hose, liquid tank and finally screw the toilet back down to the floor. It’s unnecessary to clean the base as any leftover waste will help begin the composting process for the next batch.
- (If you’re in a boat and you’re the legal distance away from shore, just send the compost flying overboard…downwind of course)
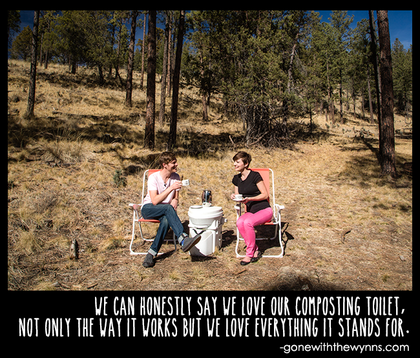
It may sound like a lot of steps but once you’ve done it a few times you’ll see its really much better than dealing with the standard RV black tank. The bonus for us: it’s not only about ease of use; it’s nice to know we’re doing something that’s a benefit for the environment and helps us wild camp for longer. So if you’re still on the fence about installing a composting toilet hopefully these How to Prep and Dump details and our “poop expert” opinion will help get you going!
Have more questions about how to prep and dump the composting toilet? Want to share your favorite dumping techniques? Let it all out in the comments below.
If you’re interested in buying our same composting toilet, the best place to purchase is directly from Nature’s Head.
Larry, the owner of Nature’s Head, has offered up a special discount to everyone that reads our site. If you click the link below he’ll beat the Amazon Price:
Buy From Nature's Head Directly
The main advantage of ordering direct, vs Amazon, is to make sure you get the options you need for your specific installation (i.e. do you need the spider handle? Do you need a solar fan? Do you need spare parts?) Click the link above, select your configuration (we have the Spider handle with extra Liquids Bottle) and at checkout the discount will be automatically added.
If you’re still in research mode you’ll want to visit our site just before you purchase to click the link above, otherwise the discount may not be automatically applied. If you have questions, the customer support team is extremely helpful and can be reached by email or phone which you’ll find on the Nature’s Head contact page.
Disclaimer – We’re not experts and this information is based on our experience and opinions. It is your responsibility to understand the local laws, rules, regulations and safety procedures before dumping any waste on the ground, into trash bins or applying to a garden.