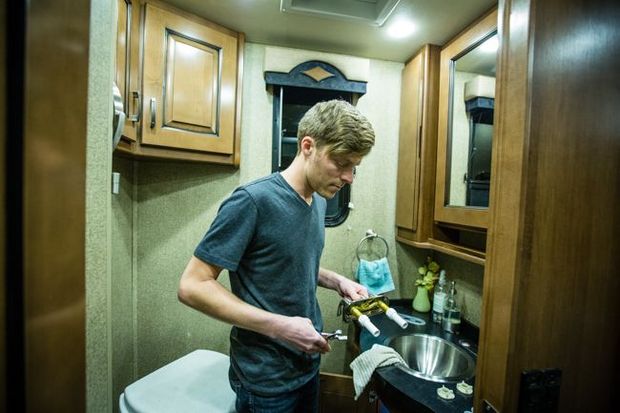
Replacing a bathroom faucet should be one of the easiest Do-It-Yourself modifications one can do in an RV. In fact it’s so easy I told Nikki “I won’t even need any tools” and “it should only take me an hour!”
Since I’m writing an entire post, and the video below is 11 minutes 25 seconds long, you can guess I hit a few road bumps along the way during my bathroom faucet swap. So with my head held low in shame, may I present our video on How NOT to Replace your RV Bathroom Faucet!
So why change the faucet in a brand new RV? Actually Roy is a test vehicle and one of the cool parts about our relationship with Fleetwood is to provide feedback. After living with Roy for a few weeks we realized the bathroom faucet needed to be replaced. I emailed the marketing manager and this was his response: “Great Feedback, I sent your email to the COO and Chief Engineer and we agree; all 2015 Excursions will have new faucets in the bathroom.” Then I received an email from the Senior Owners Relations Rep “Looks like the faucet in the Expedition should fit no problem.” And this is where it gets fun: Follow-up email from the marketing manager “We’re sending the new faucet, should be an easy swap…and it’ll make a fun video!”
I’m sure you can guess my response: Did you see my How Not To Install a Composting Toilet Video?!?
As you can see it really is a simple swap, you don’t need a lot of tools, there’s no cutting, gluing, or any real modifications. If I wouldn’t have hit any ‘bumps’ in the install I could have had this faucet replaced in less than one hour. Attempting a do-it-yourself handy man project and making silly mistakes along the way really helps me with some life lessons:
Lessons Learned:
- Take your time, there’s no rush! Think it through and test before you just dive right in. After I finished the install I was complaining to Nikki and her reply was “you were in a rush”…no I wasn’t, I replied…”you had to do it 3 times!” As usual she was right, I knew the install was simple so I didn’t really think it through.
- Read the Instructions! While cleaning after the install I picked up the plastic faucet shank extension box and on the back it reads: Instructions: Tools Required: Pipe Thread Tape 1. Wrap faucet shank threads with pipe thread tape. I wasted an hour trying to tighten the heck out of those plastic extensions, if I had just read the first line on the back of the package it would have saved me so much hassle (to be fair when I purchased the extenders the sales manager said “You don’t need Teflon Tape for this, I could sell you some, but you don’t need it”…so much for that!).
- I’m not that handy! When we purchased a house nearly 10 years ago we remodeled everything, it was a total pain in the butt and the reason we decided to sell it and move into a high rise apartment downtown just 5 years later. When we sold that house I think my handy man capabilities stayed with the property.

We still think a majority of bathroom faucet setups are complete crap in RVs, so there’s a good chance we’ll be doing this again in a future RV or Sailboat. I hope this video and post will make your life a little easier when it comes time to replace your RV faucet, after all that’s why I keep making these ridiculous install videos!