RV solar power is an expensive but worthy investment that can pay for itself in the long run. Especially if you like Wild Camping as much as we do!

Getting a crappy solar install however will cost you time and money with no benefit in return! We’ve had 4 different solar setups on three different RVs over the years and to be brutally honest: Many RV Solar installers don’t always know what they’re doing…even when they claim they do!
Over the years we’ve had our fair share of RV technicians learning the solar ropes at our expense. We’ve also had a couple of great experiences too, so don’t go thinking there’s no hope. Any tech can throw a few panels on the roof, screw them in and say “all done” but there’s a lot more to it then that. Each time we’ve had a solar kit installed we’ve found at least a few issues later on down the road. It’s been a frustrating learning experience but it’s taught us a lot. We’re hoping our hard earned lessons might save you time and money on your solar install.
Whether you plan to install your RV solar system yourself, or have it professionally done at a service center (like we did), it’s super important to understand the entire installation process. This way you know the right questions to ask, requests to make and you can confidently help design your solar install…and more importantly you’ll be able to inspect the finished job.
We’re calling this a “Guide” and not a “How To” because every RV solar install will be different. There are too many variables such as roof types, trailer vs. motorhome, battery location, panel size…the list could go on for days!
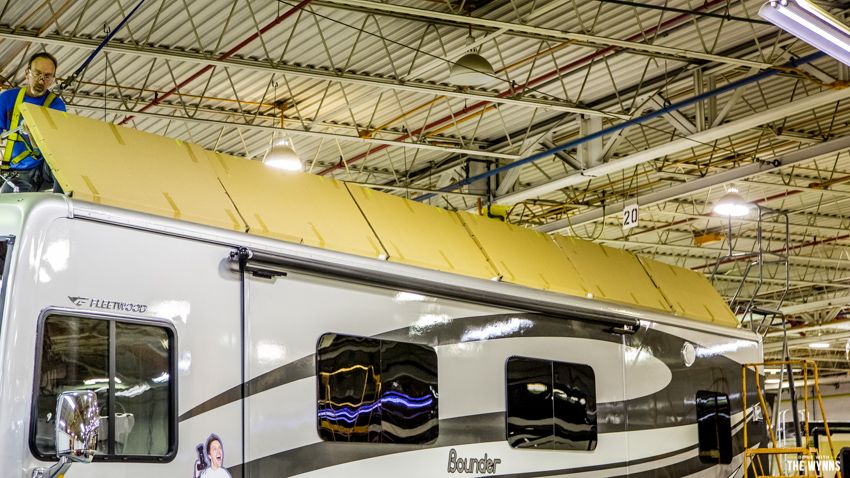
When we had our 960 Watt Solar All Electric Kit Installed at the Factory Service Center they allowed us to film the entire install. We did our best to capture most every step to help people get a visual and better understand the solar installation process.
Below are additional details that are not featured in the video.
Few Mistakes With Our Install
With our most recent All Electric Solar Kit we found a few install issues, I’ll list them from the worst to the not so terrible:
Mounting Hardware: The installer used rivets in our roof which turned out to be a mistake. Several of the rivets came loose and we had to replace all the rivets with giant wood screws. Make sure to confirm with your RV manufacturer about the roof material and what type of anchor is best to hold on the roof. Even the RV company may not be 100% sure, so you’ll want to double check with the manufacturer of the solar panels for additional guidance (customer service & warranty is why it’s important to choose a reputable solar company).
Proper MPPT Placement: Do not install the MPPT controller upside down. During a full load the fan kicks on to help dissipate heat that builds in the solar controller. When the fan kicks on it blows the heat down but since heat rises the MPPT controller doesn’t cool as easily therefor potentially putting the solar controller at risk of overheating.
Wire Length: Wires should be cut short but not too short! One of our solar connector wires is a little tight and it gets pulled a tiny bit while I’m tilting the panels, if I’m not careful this extra stress on the wire may cause problems in the future.
Have you read the directions?
If you’re kit came with directions, read them until you understand every aspect of the install. You should not rely on your RV tech to know the ins and outs of your solar kit. While the tech may have installed solar panels in the past they may not have installed a system like yours. If possible, try and be available and in the shop to confirm they are doing everything correctly.
Does your solar kit include everything?
Ensure your kit includes all mounting hardware like screws, brackets and solar cable connectors for your panels.
Sealants and adhesives are not generally included (due to expiration dates) so confirm with your installer that they have adhesive in stock and that they are not expired (one time we were held up 4 days due to expired adhesive).
Where will the panels be installed?
Measure your roof and panels then spend some time drawing your preferred solar panel setup. You may want to draw two versions in case the installer can’t do your preferred solar panel layout (you never know what’s directly under the roof so it’s good to have a backup plan ready).
Once you’ve got an idea of the panel layout place your boxes on the roof in the same arrangement to make sure it will all fit as planned before you begin carrying up the panels. To get more exact you can trim the bottom half of the box to your solar panel dimensions, saving the top of the box to cover the panels during the install.
Where are potential shadows?
Shadows are your enemy when it comes to solar panels. Keep the panels as far away from rooftop A/C units, vent fan covers or satellite/TV antennas. Remember the sun is lower on the horizon in winter making shadows even longer, so an A/C cover might not cast a shadow at 12 noon during the summer but it may completely cover the panel in winter.
What size solar & battery cables do I need (gauge/wire size)?
Solar cable length should be no more than 25 feet from the solar array to the battery bank, this reduces “voltage drop” (loss of charging power). If the cable is too long you will lose some of your solar power before it gets to the batteries.
Solar cable should be no smaller than 10 gauge. In general, the larger/thicker the wire the better the power will be transferred through the cable.
An 80-amp breaker (easily accessible) is placed on the solar positive because of the high voltage, you never know when you may need to shut down the power from the panels.
The Big Takeaway: The thicker and shorter the wire the less power loss.
Wire solar panels in Series or Parallel?
We chose to wire the panels in series because of the amount of solar panels, our wire gauge & MPPT solar controller. It’s complicated to explain this in a simple way, but if you need to know here is my best attempt at a short explanation:
Because we have wired all 6 panels in series it will output 120-volts DC. Because of this high voltage we are able to get away with 960 watts on a #10 AWG wire from the solar panels to solar controller. This effectively reduces the current going through the cable to around 9 amps. Our Outback MPPT controller steps the voltage back down from 120-volts to 12-volts in order to charge the battery bank. After leaving the MPPT controller the current is around 55 amps. From the solar controller we use a short, heavy duty #2 AWG cable to handle this large amount of power.
What is the difference between connector types (MC4 vs SAE)?
MC4 connectors typically can handle 30 amps, include #10 gauge solar cable, are water tight and won’t easily disconnect from the vibration of driving. The typical SAE connectors are rated for 20 amps and are less robust and therefore less expensive.
Best practice for a water tight cable installation?
Even if your RV doesn’t have solar pre-wire, a cable entry plate will allow you to position the solar panels as close to the battery bank as possible. The cable entry plate we installed is designed with an underside channel to ensure that when sealant is properly used it will be 100% water-tight around the edges.
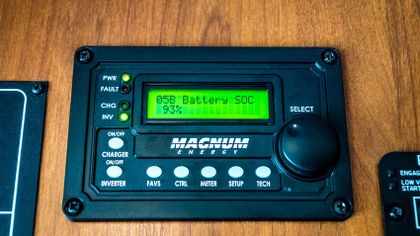
Do I need a remote for my inverter or solar controller?
In general, once the settings on the inverter and solar charge controller are entered, we “set it and forget it.” That said, we use our remotes daily to monitor battery charging, see how much solar power we have coming in and how much power we’re taking out. Remotes for the solar controller and inverter should all be easily accessible in living areas or with your RVs control panel area (with the tank monitors, A/C controls, etc.). When it’s sunny outside you’ll want to check these remote panels often and celebrate when your battery hits 100% charged while you’re out in the middle of nowhere!
Where should I install the components?
Inverters, solar controllers and batteries should be kept away from water. Batteries especially should be in a separate and enclosed area with ventilation (ventilation is a must for lead acid batteries, but check with the battery mfr about AGM or Lithium batteries).
Do not place inverters or MPPT charge controllers inside your RV, they often produce heat and in the summer they will not only heat up your RV but the fans can be loud. We recommend installing these items in a water tight storage bay.
Fuses for inverters should be located as close to the battery bank as possible. All fuses should be easily accessible if/when they need replacement.
Is it safe to walk on the roof with the solar panels?
You will need to get on the roof to clean your panels, for tilting and inspection for sealant wear. It’s important to leave a path to safely walk around the roof, you do not want to walk on the solar panels. Avoid a tripping hazard with less exposed cable on the roof. You should be able to run most of the wiring under the panels so there is as little exposed wiring as possible.
We hope our experiences and tips will help you have a smooth solar install with nothing but sweet sunshine and wild camping to look forward to.